MBaaS on Cloud Foundry: How to Deploy LoopBack

In a recent blog post on how to deploy Helios MBaaS to Cloud Foundry, I promised another tutorial for an alternative mobile back end powered by Node.js. So, today, I will walk you through the steps for installing LoopBack.
LoopBack (by StrongLoop) is an open source mobile back end based on Node.js. It has SDKs for iOS and Android, as well as a buildpack for Cloud Foundry. To function normally, LoopBack requires a JSON file with model description. Deploying LoopBack is easy; at least, it is much simpler than deploying Helios. Still, there are some prerequisites. We will need to install several things:
- Node.js
- Node Package Manager (NPM)
- StrongLoop CLI
So, let’s get down to work.
1. Installing Node.js and NPM
The Node.js and NPM in the Ubuntu repository are pretty old. This is why I suggest you install a new Node Version Manager:
1 | curl https://raw.github.com/creationix/nvm/master/install.sh | sh |
Then re-open your terminal and type:
1 2 | nvm install 0.10 nvm alias default 0.10 |
2. Installing StrongLoop CLI
To install the StongLoop CLI, type:
1 | npm install -g strong-cli |
Now we are ready to create our LoopBack app. To do this, use:
1 2 3 4 5 6 7 | slc lb project cf_loopback_app # ... # Create a model in your app: # $ cd cf_loopback_app # $ slc lb model product -i # Run your Project: # $ slc run . |
It will create a cf_loopback_app folder in your current directory. Next, we will create a simple model to play with. To do this, inside of cf_loopback_app, type the following:
1 2 | slc lb model company # Created company model. |
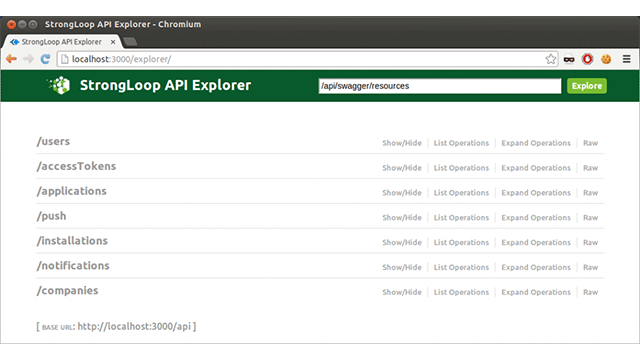
Now you can check out what you have in http://localhost:3000/explorer/. Only one line of code left before we can deploy our app to Cloud Foundry.
3. Deploying to Cloud Foundry
“One ring to rule them all, one ring to find them,
One ring to bring them all and in the darkness bind them.”
(c) someone everyone knows
Almost like that, to deploy your application to Cloud Foundry, use:
1 2 3 4 5 6 7 8 9 10 11 12 13 14 15 16 17 18 19 20 21 22 23 24 25 26 27 28 29 30 31 32 33 34 35 36 37 38 39 40 41 42 43 44 45 46 47 48 | cf push # Name> loopback # Instances> 1 # 1: 128M # 2: 256M # 3: 512M # 4: 1G # Memory Limit> 3 # Creating loopback... OK # 1: loopback # 2: none # Subdomain> 1 # 1: cloudfoundry.yourcfdomain.com # 2: none # Domain> 1 # Creating route loopback.cloudfoundry.yourcfdomain.com... OK # Binding loopback.cloudfoundry.yourcfdomain.com to loopback... OK # Create services for application?> n # Bind other services to application?> n # Save configuration?> y # Saving to manifest.yml... OK # Uploading loopback... OK # Preparing to start loopback... OK # -----> Downloaded app package (8.7M) # ... # -----> Installing dependencies # npm WARN package.json cf_loopback_app@0.0.0 No description # npm WARN package.json cf_loopback_app@0.0.0 No repository field. # npm WARN package.json cf_loopback_app@0.0.0 No README data # -----> Caching node_modules directory for future builds # -----> Cleaning up node-gyp and npm artifacts # -----> No Procfile found; Adding npm start to new Procfile # -----> Building runtime environment # -----> Uploading droplet (14M) # Checking status of app 'loopback'... # 0 of 1 instances running (1 starting) # 1 of 1 instances running (1 running) # Push successful! App 'loopback' available at loopback.cloudfoundry.yourcfdomain.com |
Do not forget that Cloud Foundry has its own preferences about ports:
1 | <a href="http://loopback.cloudfoundry.yourcfdomain.com/explorer/" target="_blank" rel="noopener noreferrer">http://loopback.cloudfoundry.yourcfdomain.com/explorer/</a> |
This is it. Now you should have your application up and running on the Cloud Foundry PaaS.


