How to Use MS SQL Server with Cloud Foundry v2 (New Service Broker Available)

We’ve just released the .NET Cloud Foundry Service, a Microsoft .NET-based service broker that provides a possibility to use MS SQL Server with Cloud Foundry v2. The broker allows for easy developing and deploying Cloud Foundry services using the Microsoft technology stack. For example, you can quickly add support for the databases of choice, since you only need to implement a single interface. At the moment, the broker is distributed with one default service implementation (MS SQL Server). Below follows a step-by-step tutorial on implementing the service.
Installing the .NET Cloud Foundry Service Broker
Before you start, make sure that you have the Cloud Foundry Command Line Interface. Installation instructions are available in the official docs. Alternatively, you can use the GCF client, which is a more up-to-date version of the CF tool. Then follow the steps below.
- Install the
BrockerServiceSetup.exepackage on your target machine. - Configure the network environment to make the service accessible from Cloud Foundry.
- Update the application configuration file with proper settings (add the connection string to Microsoft SQL Server, its public address, etc.) The default configuration file is located here.
- Restart the service using the service console to apply all configuration changes.
Registering the .NET Service Broker in Cloud Foundry
Indicate the target cloud and select your organization and space.
1 | cf target [your cloud foundry api url] |
Authenticate with the target Cloud Foundry login. Here you have to use an admin account with corresponding access rights. Then, view the existing service brokers.
1 | cf service-brokers |
Register the .NET Cloud Foundry Service Broker in Cloud Foundry.
1 | cf add-service-broker TestDotNetServiceBroker --username s --password p --url [your BrokerWindowsService url] |
Registering a broker causes the cloud controller to fetch and validate catalog information from this broker and save the catalog to the cloud controller database.
View existing service brokers.
1 | cf service-brokers |
Making your plan public
Before using the service, you have to register at least one service plan as public. So, get the service plan GUID.
1 | cf services --marketplace –trace |
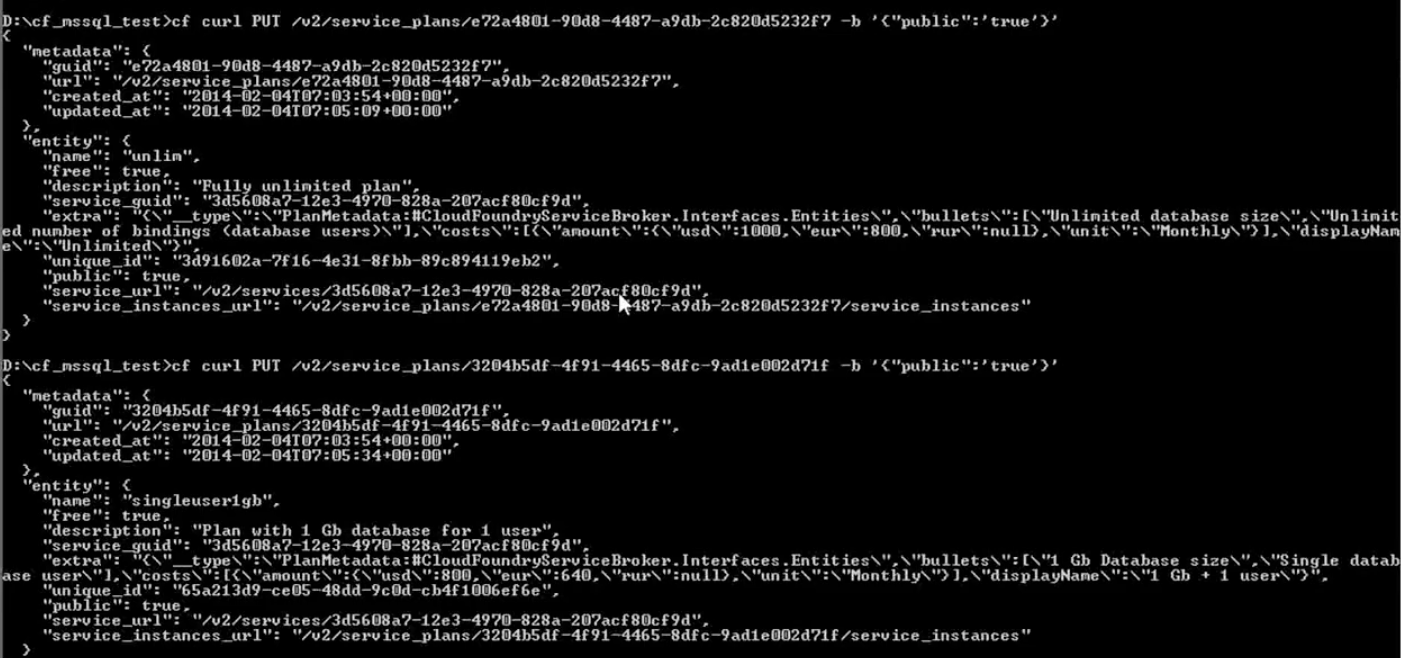
Make the service plan public by running the following command with the service plan GUID.
1 | cf curl PUT /v2/service_plans/[plan_guid_obtained_on_previous_step] -b '{"public":'true'}' |
To check that you plan has been successfully set to public, run this command again and see the “public” field.
1 | cf services --marketplace –trace |
Getting your service up and running
Create a new service instance, choose the required service type, and set the service name and plan.
1 | cf create-service |
Display the information about current service instances in the current space.
1 | cf services |
Deploying and running an app with the new services
Change the current directory to the directory with the app you would like to deploy (the manifest file must be available). Then, deploy the new application with cf push.
Bind the service to the application (select the deployed app and service while the command is running).
1 | cf bind-service |
Restart the application.
1 | cf restart [deployed app] |
Now the application is ready to use the new service.
Removing service bindings from your app
Remove the service binding from the application (select the deployed application and service while the command is running).
1 | cf unbind-service |
Delete the service (select the deployed application and service while the command is running).
1 | cf delete-service |
We are also planning to implement sharded deployment and reshape the cluster. Follow @altoros to get updated.


