How to Discover Services on Lattice with Consul


Lattice is a light-weight, open-source tool for clustering containers. In a Lattice cluster, containers represent long-running processes or one-time tasks that are scaled and scheduled dynamically. Apps running in containers have to use external services, such as MySQL, RabbitMQ, etc., but if these services are dynamic, you cannot hardcode their IPs to the client.
The solution is to use a service discovery product, such as Consul, a highly available, distributed tool for discovering and configuring services. In this tutorial, we describe how an app running in Lattice can discover a MySQL service with Consul.
Prerequisites
First, you need to download three Vagrant boxes, which are approximately 2 GB in size. So, make sure you have a good Internet connection. You will also need 1 GB of RAM for each machine (4 GB in total).
In our case, the environment is:
- MacOS X 10.10.1
- Vagrant 1.7.2
- VirtualBox 4.3.28
You can try repeating the steps described in this tutorial on any configuration, but this one has been tested, and it definitely works.
Creating a cluster
To get started, let’s spin up four virtual machines. We use Vagrant and VirtualBox to do this on a laptop (without any external infrastructure provider, like AWS). This makes deployment faster and much simpler.
$ vagrant up
  Bringing machine 'mysql01' up with 'virtualbox' provider...
  Bringing machine 'mysql02' up with 'virtualbox' provider...
  Bringing machine 'consul' up with 'virtualbox' provider...
  Bringing machine 'lattice' up with 'virtualbox' provider...
We need to open SSH sessions to MySQL and Consul VMs. You will be interacting with Lattice using the Lattice CLI, so you don’t need to SSH to it.
$ vagrant ssh mysql01
$ vagrant ssh mysql02
$ vagrant ssh consul
$ ltc target 10.0.0.13.xip.io
    Api Location Set
Now, start your Consul cluster.
consul$ consul agent -server -bootstrap-expect 1 -data-dir /tmp/consul \
-bind=10.0.0.10 -ui-dir /opt/ui -client=10.0.0.10

mysql01$ consul agent -data-dir /tmp/consul -bind=10.0.0.14 \
-config-dir /etc/consul.d -join 10.0.0.10

mysql02$ consul agent -data-dir /tmp/consul -bind=10.0.0.11 \
-config-dir /etc/consul.d -join 10.0.0.10
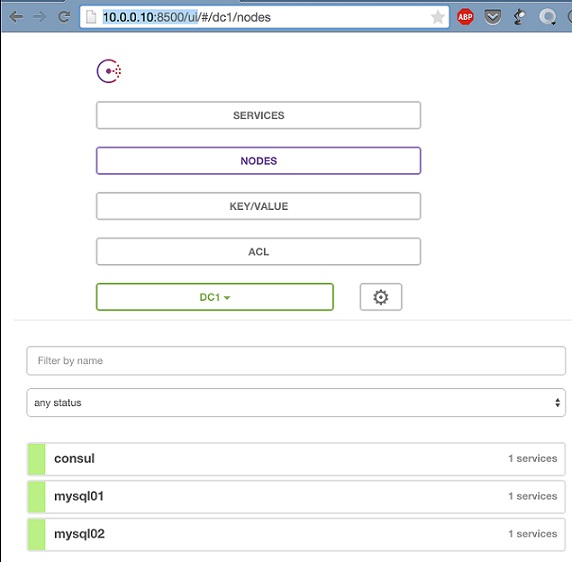
So, we have launched Consul in a server mode on one node and in a client mode on two more nodes. Now, we need to verify that the cluster is running, and the clients are registered in the Consul Web UI.

Registering the MySQL service
Once our Consul infrastructure is up and running, it’s time to register the MySQL service. This has already been done for you, so let’s just verify it. To display the status of the MySQL service and make sure it is running, use the command below.
vagrant@mysql01:~$ sudo service mysql status
    mysql start/running, process 1106
Then, connect to port 3306 using the CLI and check if it is listening to the port.
vagrant@mysql01:~$ mysql -h10.0.0.11 -P3306 -ulexsys --password=altoros
    mysql>
Finally, run a query against MySQL. We will use the following query to check database health.
mysql> select @@hostname;
    +------------+
    | @@hostname |
    +------------+
    | mysql01    |
    +------------+
    1 row in set (0.00 sec)
Check the service definition for MySQL.
vagrant@mysql01:~$ cat /etc/consul.d/mysql.json
{
  "service": {
    "name": "mysql",
    "port": 3306,
    "check": {
      "script": "/etc/consul.d/scripts/mysql_health.sh",
      "interval": "10s"
    }
  }
}
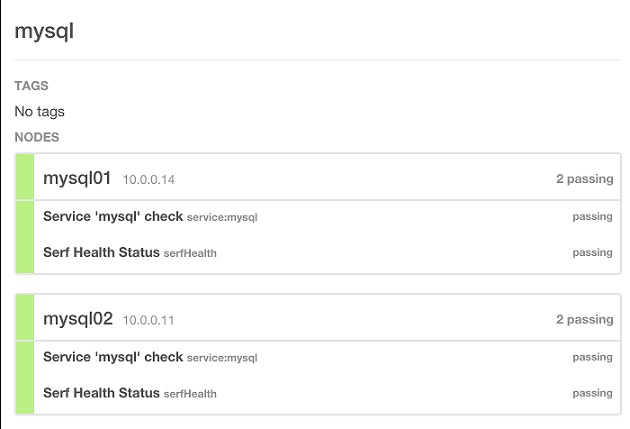
View the status of the MySQL service in the Consul Web UI.

Discovering a MySQL service from Lattice
Let’s make sure that we can discover the service using DNS and HTTP interfaces.
vagrant@mysql02:~$ dig @127.0.0.1 -p 8600 mysql.service.consul SRV
  ;; ANSWER SECTION:
  mysql.service.consul.	0	IN	SRV	1 1 3306 mysql01.node.dc1.consul.
  mysql.service.consul.	0	IN	SRV	1 1 3306 mysql02.node.dc1.consul.

  ;; ADDITIONAL SECTION:
  mysql01.node.dc1.consul. 0	IN	A	10.0.0.14
  mysql02.node.dc1.consul. 0	IN	A	10.0.0.11


$ curl http://localhost:8500/v1/catalog/service/mysql | jq .
[
  {
    "ServicePort": 3306,
    "ServiceAddress": "",
    "ServiceTags": null,
    "ServiceName": "mysql",
    "ServiceID": "mysql",
    "Address": "10.0.0.11",
    "Node": "mysql02"
  },
  {
    "ServicePort": 3306,
    "ServiceAddress": "",
    "ServiceTags": null,
    "ServiceName": "mysql",
    "ServiceID": "mysql",
    "Address": "10.0.0.14",
    "Node": "mysql01"
  }
]
We see that MySQL is running on two nodes, which IPs are 10.0.0.11 and 10.0.0.14.
Now, let’s push the Docker container with the application to Lattice. The container image is located on Docker Hub and is publicly available. There are a Consul agent alongside with a Go application inside. The application asks the local Consul agent what the MySQL service IPs are and chooses one of them randomly.
$ ltc create consul lexsys/consul-app -r -- "/opt/app.sh"
  ...
  Creating App: consul
  ...
  http://consul.10.0.0.13.xip.io
The next step is to point your browser to the application’s endpoint (`/demo`) and refresh several times. You will see that the application balances between the MySQL instances.
Below is the output for port 10.0.0.11.

And the similar one for port 10.0.0.14.

Let’s emulate failure of one service node. To do so, we will shut down one of the MySQL instances.
vagrant@mysql01:~$ sudo service mysql stop
    mysql stop/waiting
Our app doesn’t try to connect to the failed instance.

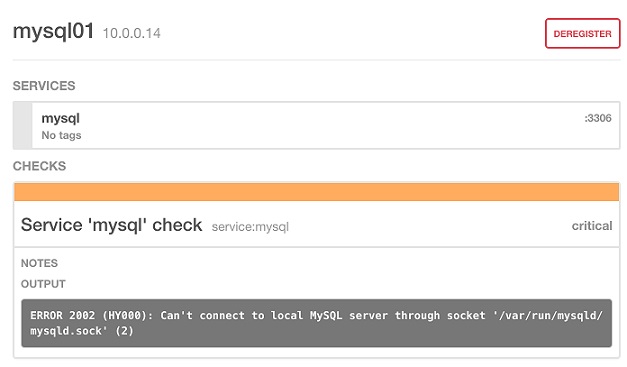
We can see a failed health check in the Consul’s Web UI.

Now, start the MySQL service.
vagrant@mysql01:~$ sudo service mysql start
    mysql start/running, process 2576
This is it. Our application automatically learns that a new service instance is available and starts using it. Below is the output for port 10.0.0.11.

Likewise, you get the output for port 10.0.0.14.

To replicate this process, use the source code from this GitHub repository.
Related videos
In this video, Juan Pablo Genovese and Aleksey Zalesov talk about enabling service discovery with Lattice during the Cloud Foundry Summit 2015.
In this video, Alexey explains how to discover MySQL on Lattice via a console means.
Further reading
- Cloud Foundry Containers: Warden, Docker, and Garden
- K8s Meets PCF: Pivotal Container Service from Different Perspectives
- Cloud Foundry Advisory Board Meeting, Nov 2018: VMs vs. Containers</li>
About the author
Aleksey Zalesov is a Cloud Foundry/DevOps Engineer at Altoros. He is an IBM Tivoli Certified Specialist with seven years of experience in system administration. Aleksey specializes in systems for IT monitoring and management, such as BOSH, a tool that can handle the full life cycle of large distributed systems, e.g., Cloud Foundry. His other professional interests include performance tuning techniques for Linux containers, etc.


