How to Deploy a React.js App to GE’s Predix
Introduction to React
React is a JavaScript library for building user interfaces. The technology is backed by Facebook and Instagram—among others. For building user interfaces, React provides only a view layer and uses a JavaScript syntax extension called JSX to write HTML markup right in the component code. One of the examples can be found below.
example.js
import React from 'react';

class Hello extends React.Component {
	render() {

		return (
			<h1>Hello World</h1>
		);
	}
}

React.render(<Hello />, document.getElementById('root'));
The main reasons why React is great are as follows:
- It is declarative. Instead of telling your program how to do something, you tell what you want to do (for example, using
Arraymethods as opposed to the manual implementation of some operations with elements). React is declarative when we describe components, however, it is more imperative when we describe state changes. - It is JavaScript. Moving HTML to JavaScript code (JSX) is a good idea. JavaScript can process whole HTML elements inside faster than individual DOM node changes. A virtual DOM keeps a copy of the real DOM tree and makes changes only when necessary. Another advantage is that you do not have to learn specific syntax for writing templates (unlike different template syntax in different AngularJS versions:
*ngFor,[click],ng-repeat, andng-click). If you know JavaScript, you can write in React easily. - Unidirectional data flow.
- Decomposition. The app is broken into smaller components.
- Explicit mutations. Explicit changes of the state are done via the
setStatemethod.
Configuring a React project
npm
npm is the package manager for JavaScript. Not so long ago, npm was used only for Node.js, but now it is a universal package manager that contains all types of JavaScript packages.
If you already installed npm, just type npm init in the terminal to start working with it. It will initialize a new project for you by creating the package.json file.
To install a module, type npm install <module name> --save (the --save flag tells npm to save this module in package.json). There are two types of dependencies in the package.json file: dependencies and devDependencies. The first type includes frameworks or libraries needed for the application code. The second type in general contains bundle packages needed for transforming the code.
npm scripts
npm scripts are also a very important feature of the package manager. Sometimes, it is difficult to start the project server and tests or build the project when you look at it for the first time. npm scripts allow you to make aliases for any commands. If you are not familiar with the project structure, you can see the main commands in the scripts section in the package.json file. Just describe your command in package.json.
"scripts": {
 "start": "webpack-dev-server --progress",
 "build": "NODE_ENV=production node_modules/.bin/webpack -p --progress --colors"
}
To run a command, type npm run <command name>.
webpack
webpack bundles all your code into a single file. However, it can be quite tricky to write your first webpack config, since its documentation is not extensive (on the moment of writing this article). So, we are going to keep things pretty simple.
entry:  __dirname + "/app/App.js",
  output: {
    path: __dirname + "/public",
    filename: "bundle.js"
  }
Here, the entry field is the root component of the app. It compiles all the code in a single file called bundle.js to the path public/bundle.js. During the compilation, we run the code through different loaders that do some transformation. (In our case, Babel compiles ES6 and React JSX into ES5.) See the example below.
module: {
 loaders: [{
   test: /\.jsx?$/,
   exclude: /node_modules/,
   loader: 'babel',
   query: {
     presets: ['es2015','react']
   }
 }]
}
The bottom line is that webpack allows you to take your code, transform it, and then compile it all together and output in a single file.
Babel
Babel, a JavaScript compiler, allows you to do the transformation that we discussed above. As you can see below, this is not valid JavaScript code.
class Hello extends React.Component {
	render() {

		return (
			<h1>Hello World</h1>
		);
	}
}
The syntax is called JSX, and many programmers really like it. Babel transforms the JSX code into regular JavaScript, so that the browser can understand it. Furthermore, Babel can be used for adding the ES6 syntactic sugar to your project. We use two presets in our project: JSX and ES6 transformations.
query: {
 presets: ['es2015','react']
}
Project structure
For this article, we use a simple project structure, because the project is not big enough. We placed the code of all the components in a single-folder app. However, if the project grows, this approach will not be suitable.
It is important to separate two types of React components—containers and representative components—and place them into different directories. Containers are the components that contain app logic and can be reusable. Representative components are simple views that include only the render method, get data, and render the view according to props.
Decomposition of the components
The main component that renders our Board component is App.
class App extends Component {
 render() {
   return (
     <Board></Board>
   );
 }
}

render(<App />, document.getElementById('root'));
To render the main component, you need the react-dom module.
import {render} from 'react-dom'Previously, this module was a part of React, but now it is an independent module for rendering. It was separated to have the possibility to use the module with other frameworks, not only with React.
All React decomposition can be represented as a graph. For example, our app is represented by the scheme below.

That is why you have to fill in only the main entry in the webpack.config file.
Deploying the app to Predix
Before deploying your app to Predix, install the Cloud Foundry CLI and verify the installation by typing cf in the terminal.
To deploy your app, create a space in your Predix account—log in to www.predix.io and use the Create space button.
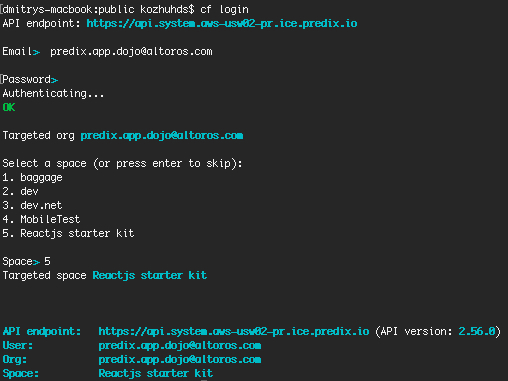
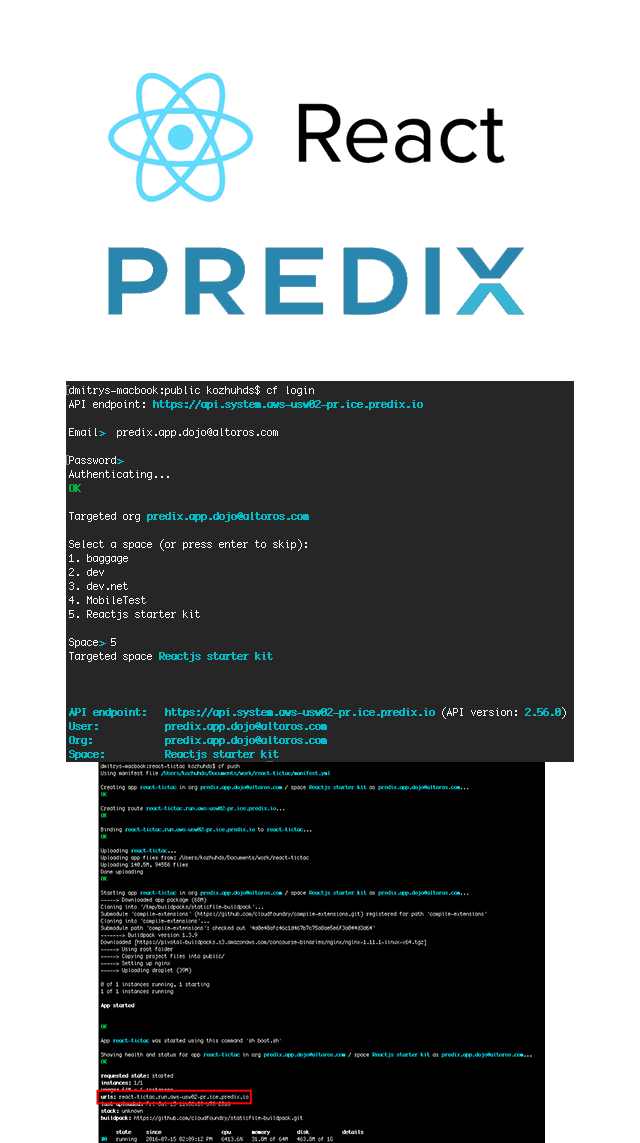
Then, you need to log in to Cloud Foundry—go to the terminal and type cf login.
The terminal asks for the API endpoint, so we use the following: https://api.system.aws-usw02-pr.ice.predix.io.
Next, enter your Predix account credentials and select the previously created space.
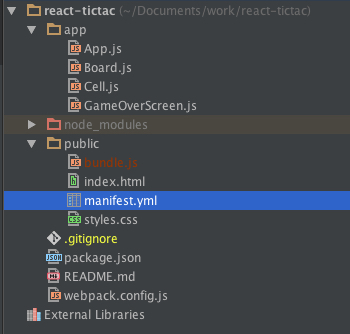
For deploying an app to Predix, you also need to create the manifest.yml file.
Replace <app name> with your app name. In our case, it is react-tictac.
Then, move the manifest.yml to the directory with the compiled project.
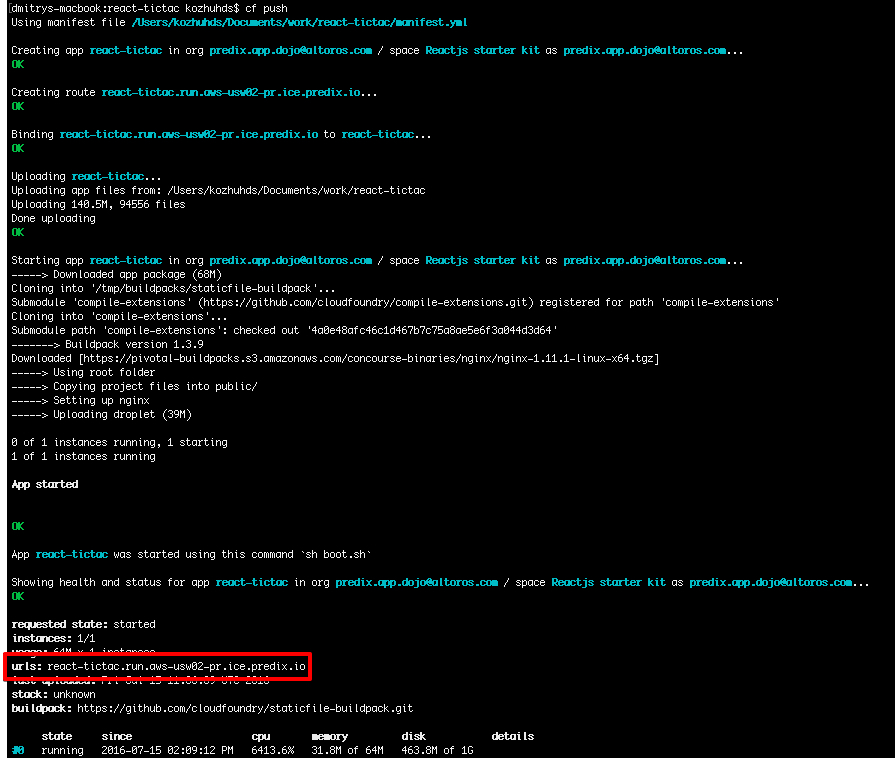
Go to the terminal, type cd <compiled-files-folder>, and then use the cf push command.
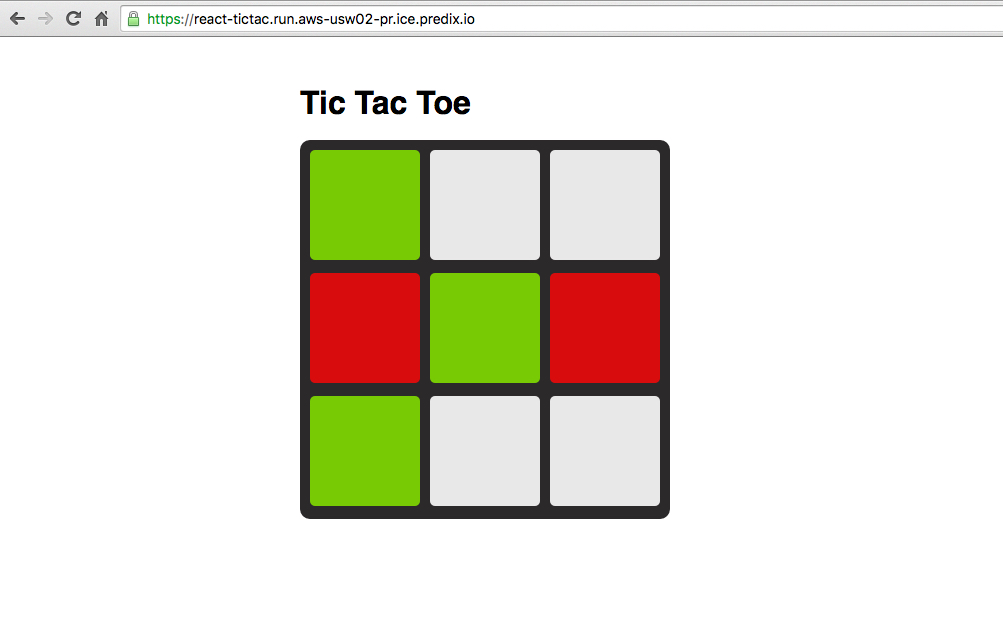
That’s it. Your app is available via HTTPS. (The URL is highlighted in the screenshot above.)
Further reading
- Introducing a One-Click Button for Deploying to GE Predix
- How to Set Up Predix Analytics Services and Use Them from a Node.js App
- How to Create a Page Layout and Login by Using Predix UI


