Creating Your First Serverless App with AWS Lambda and the Serverless Framework
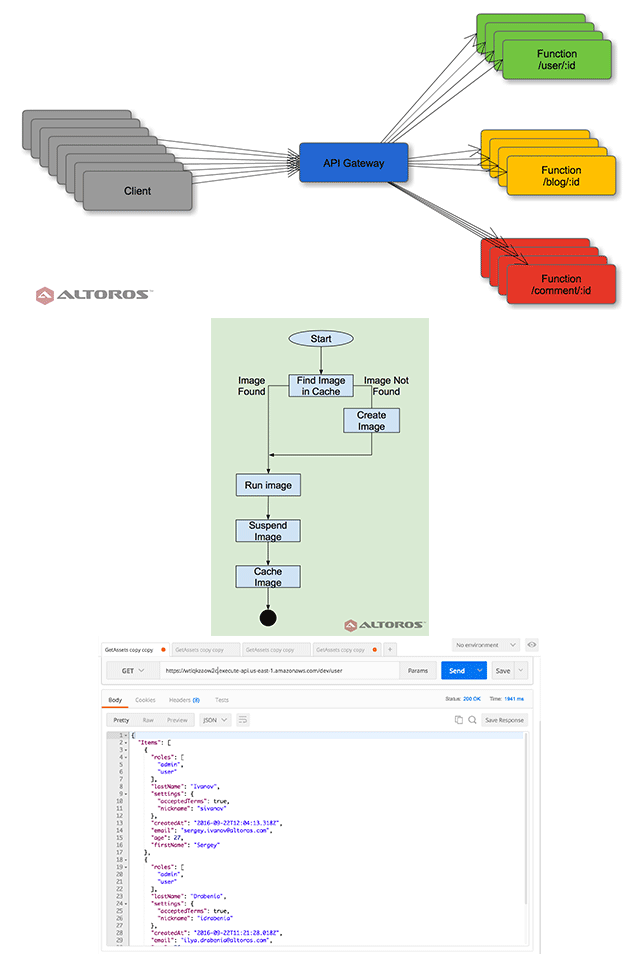
Serverless architectures are one of the newest trends in computing that brings reduced infrastructure and development costs to the table. According to this approach, an application is split into multiple functions with each of them deployed separately.
Here, we demonstrate how to create a serverless application and deploy it to AWS Lambda, as well as explain some of the architecture basics.
Serverless architectures
In serverless architectures, all routines that process events are defined individually. This allows for assigning computation resources to a routine only when it is executed and minimizes the time of using the resources.
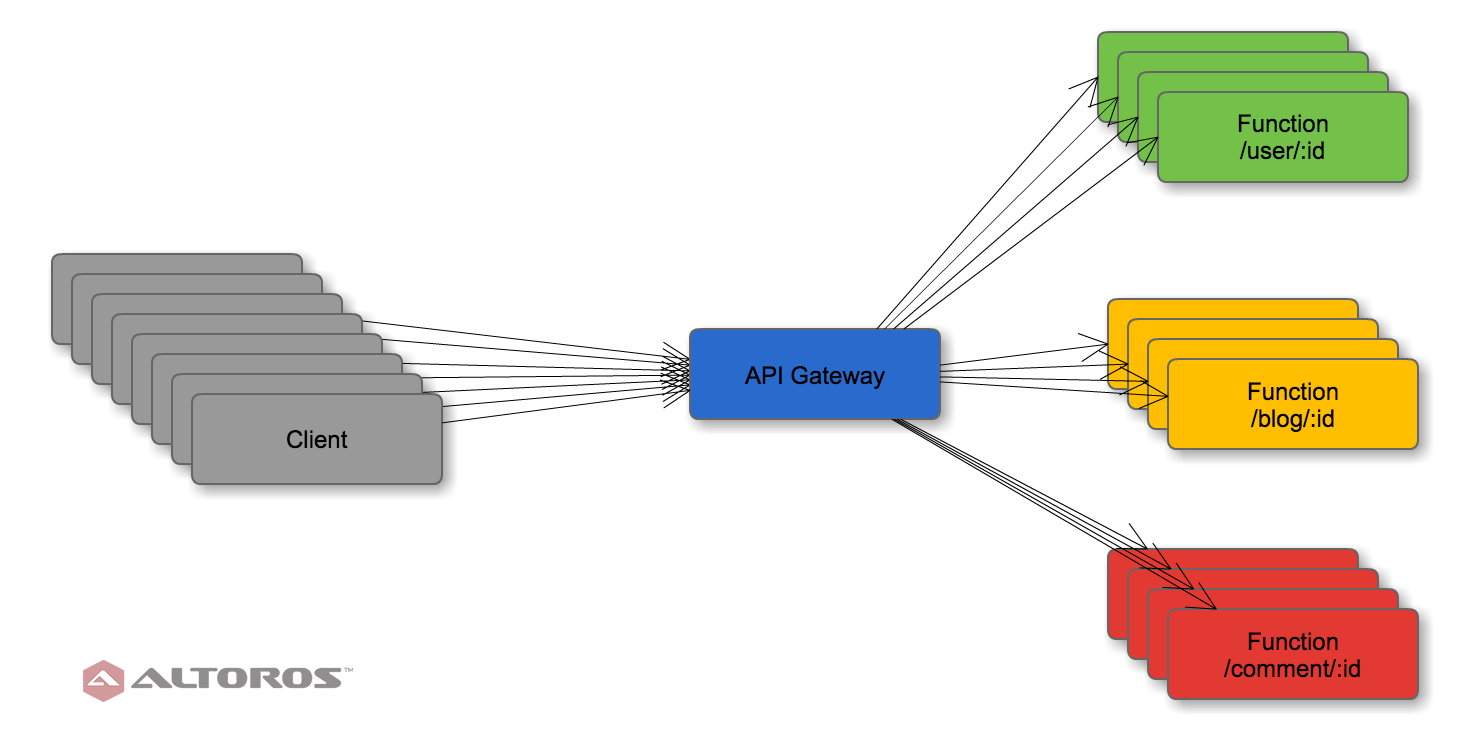
Blog application deployed according to the serverless model
Currently, among the major vendors that provide supporting services for serverless architectures are AWS Lambda, Google Cloud Functions, OpenWhisk (available in IBM Bluemix), and Azure Functions.
For instance, OpenWhisk creates a Docker image for each function. When an event requires processing, OpenWhisk runs these images in a container and processes the event. Then, the service suspends the container and puts it to cache. If the functions are called frequently, the existing container is reused from the cache. Otherwise, OpenWhisk will create a new container for each request.
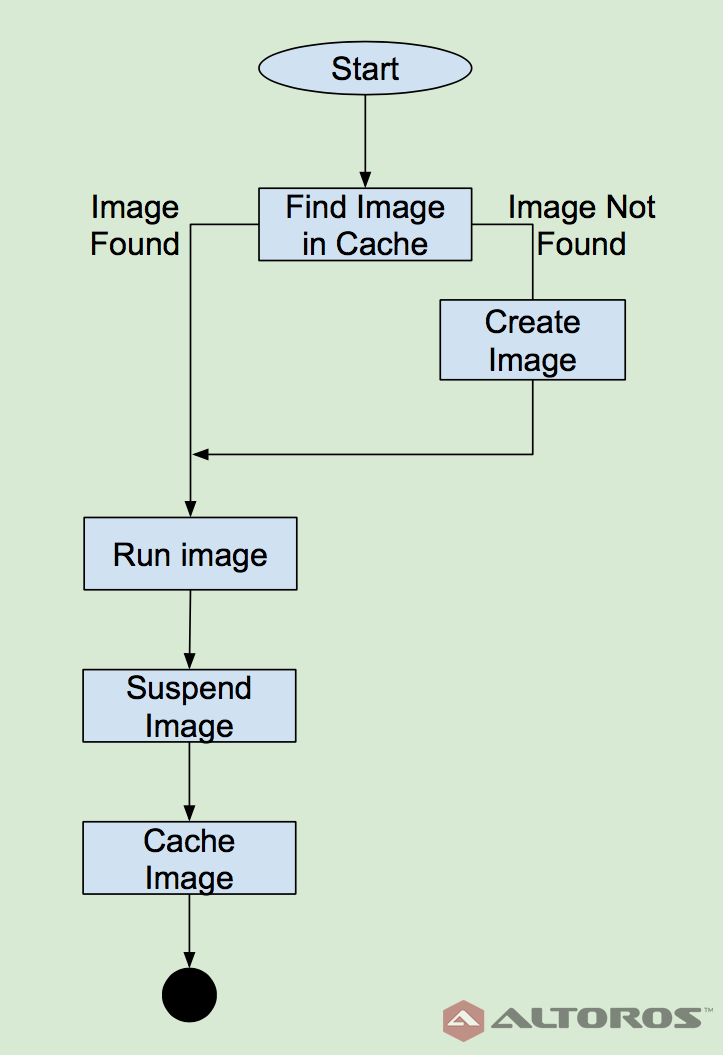
Event processing algorithm for OpenWhisk
However, the serverless model is not ideal for development. The separate definition and deployment of functions is not very useful when implementing applications. For this reason, there are a number of frameworks—such as Serverless, Apex, and Lambada—that allow you to simplify the development and implement functionality without a paradigm shift.
The Serverless framework
Serverless is one of the best-known frameworks that facilitate implementation of serverless architectures. It provides a set of command line tools for creating, deploying, and invoking serverless applications. Currently, Serverless supports only AWS Lambda, but there are plans to add OpenWhisk, Azure Functions, and Google Cloud Functions in future releases.
With the framework, you can create an application in a usual way, define all functions that will be used for event processing, and deploy this application to a cloud.
To get started, we need to create a project:
1 2 3 4 5 6 7 8 9 10 11 12 13 14 15 16 | Ilyas-MacBook-Pro:prototypes idrabenia$ mkdir serverless-hello Ilyas-MacBook-Pro:prototypes idrabenia$ cd ./serverless-hello/ Ilyas-MacBook-Pro:serverless-hello idrabenia$ serverless create --name test --template aws-nodejs Serverless: Creating new Serverless service... _______ __ | _ .-----.----.--.--.-----.----| .-----.-----.-----. | |___| -__| _| | | -__| _| | -__|__ --|__ --| |____ |_____|__| \___/|_____|__| |__|_____|_____|_____| | | | The Serverless Application Framework | | serverless.com, v1.0.0-rc.1 -------' Serverless: Successfully created service with template: "aws-nodejs" Serverless: NOTE: Please update the "service" property in serverless.yml with your service name Ilyas-MacBook-Pro:serverless-hello idrabenia$ ls event.json handler.js serverless.yml |
After this sample project is created, you can see three files. Below is the serverless.yaml configuration file:
 'service: aws-nodejs # NOTE: update this with your service name'

provider:
  name: aws
  runtime: nodejs4.3

functions:
  hello:
    handler: handler.hello
The file contains the configuration of the function that will be deployed to the cloud.
The handler.js file includes the definition of this function:
'use strict';

// Your first function handler
module.exports.hello = (event, context, cb) => cb(null,
  { message: 'Go Serverless v1.0! Your function executed successfully!', event }
);

// You can add more handlers here and reference them in serverless.yml
Thus, you can just specify the functions of your application in serverless.yaml and implement it as a traditional web application.
The third file—event.json—contains a sample event for the default handler.
Creating your first serverless application
To implement a serverless architecture, we decided to create a simple REST API for the CRUD operations of the application user entity. In this scenario, we used the DynamoDB NoSQL database provided by AWS.
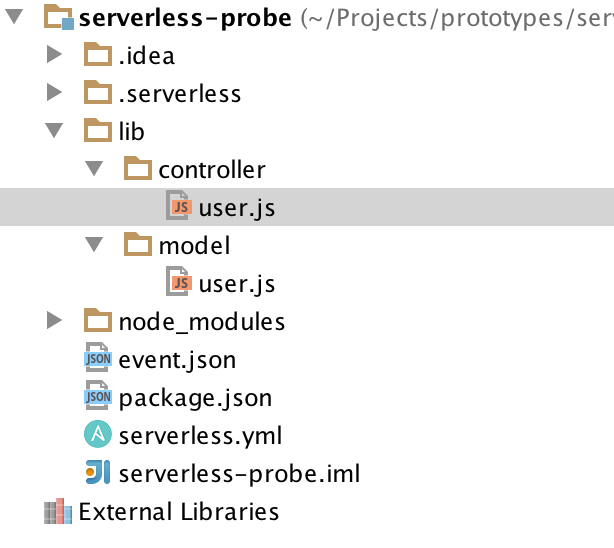
Project structure
For implementing the entity model and persistence, we used the vogels library and Joi validator.
The model/user.js file:
'use strict';

let vogels = require('vogels');
let Joi = require('joi');
vogels.AWS.config.update({region: 'us-east-1'});


let User = vogels.define('User', {
 hashKey: 'email',

 // add the timestamp attributes (updatedAt, createdAt)
 timestamps: true,

 schema: {
   email: Joi.string().email(),
   firstName: Joi.string(),
   lastName: Joi.string(),
   age: Joi.number(),
   roles: vogels.types.stringSet(),
   settings: {
     nickname: Joi.string(),
     acceptedTerms: Joi.boolean().default(false)
   }
 }
});

module.exports = User;
Also, there is a controller that enables all required CRUD operations and exposes them through a REST API. Here is the code of the controller/user.js file:
'use strict';

let User = require('./../model/user');
let vogels = require('vogels');


function UserController () {
 let self = this;

 self.create = function (event, context, cb) {
   vogels.createTables(() => User.create(user, cb));
 };

 self.list = function (event, context, callback) {
   User.scan().limit(20).exec(callback);
 };

 self.update = function (event, context, callback) {
   new User(event.body).save(callback);
 };

 self.delete = function (event, context, callback) {
   User.destroy(event.path.id, (err) => callback(err, {}));
 };
}

module.exports = new UserController();
The configuration for the API is below:
1 2 3 4 5 6 7 8 9 10 11 12 13 14 15 16 17 18 19 20 21 22 23 24 25 26 27 28 29 30 31 | service: aws-nodejs provider: name: aws runtime: nodejs4.3 iamRoleStatements: - Effect: "Allow" Action: - "*" Resource: # next role requires to allow AWS Lambda routines access to DynamoDB - "arn:aws:dynamodb:us-east-1:[ACCOUNT_ID]:table/*" functions: userCreate: handler: lib/controller/user.create events: - http: POST user userList: handler: lib/controller/user.list events: - http: GET user userUpdate: handler: lib/controller/user.update events: - http: POST user/{id} userDelete: handler: lib/controller/user.delete events: - http: DELETE user/{id} |
Then, we can deploy the application to AWS Lambda:
1 2 3 4 5 6 7 8 9 10 11 12 13 14 15 16 17 18 19 | ilyas-mbp:serverless-probe idrabenia$ serverless deploy Serverless: Packaging service... Serverless: Removing old service versions... Serverless: Uploading CloudFormation file to S3... Serverless: Uploading service .zip file to S3... Serverless: Updating Stack... Serverless: Checking Stack update progress... ........................................................ Serverless: Stack update finished... Service Information service: aws-nodejs stage: dev region: us-east-1 endpoints: POST - https://wtiqkzaow2c.execute-api.us-east-1.amazonaws.com/dev/user GET - https://wtiqkzaow2c.execute-api.us-east-1.amazonaws.com/dev/user POST - https://wtiqkzaow2c.execute-api.us-east-1.amazonaws.com/dev/user/{id} DELETE - https://wtiqkzaow2c.execute-api.us-east-1.amazonaws.com/dev/user/{id} |
It is also possible to test the API using Postman:
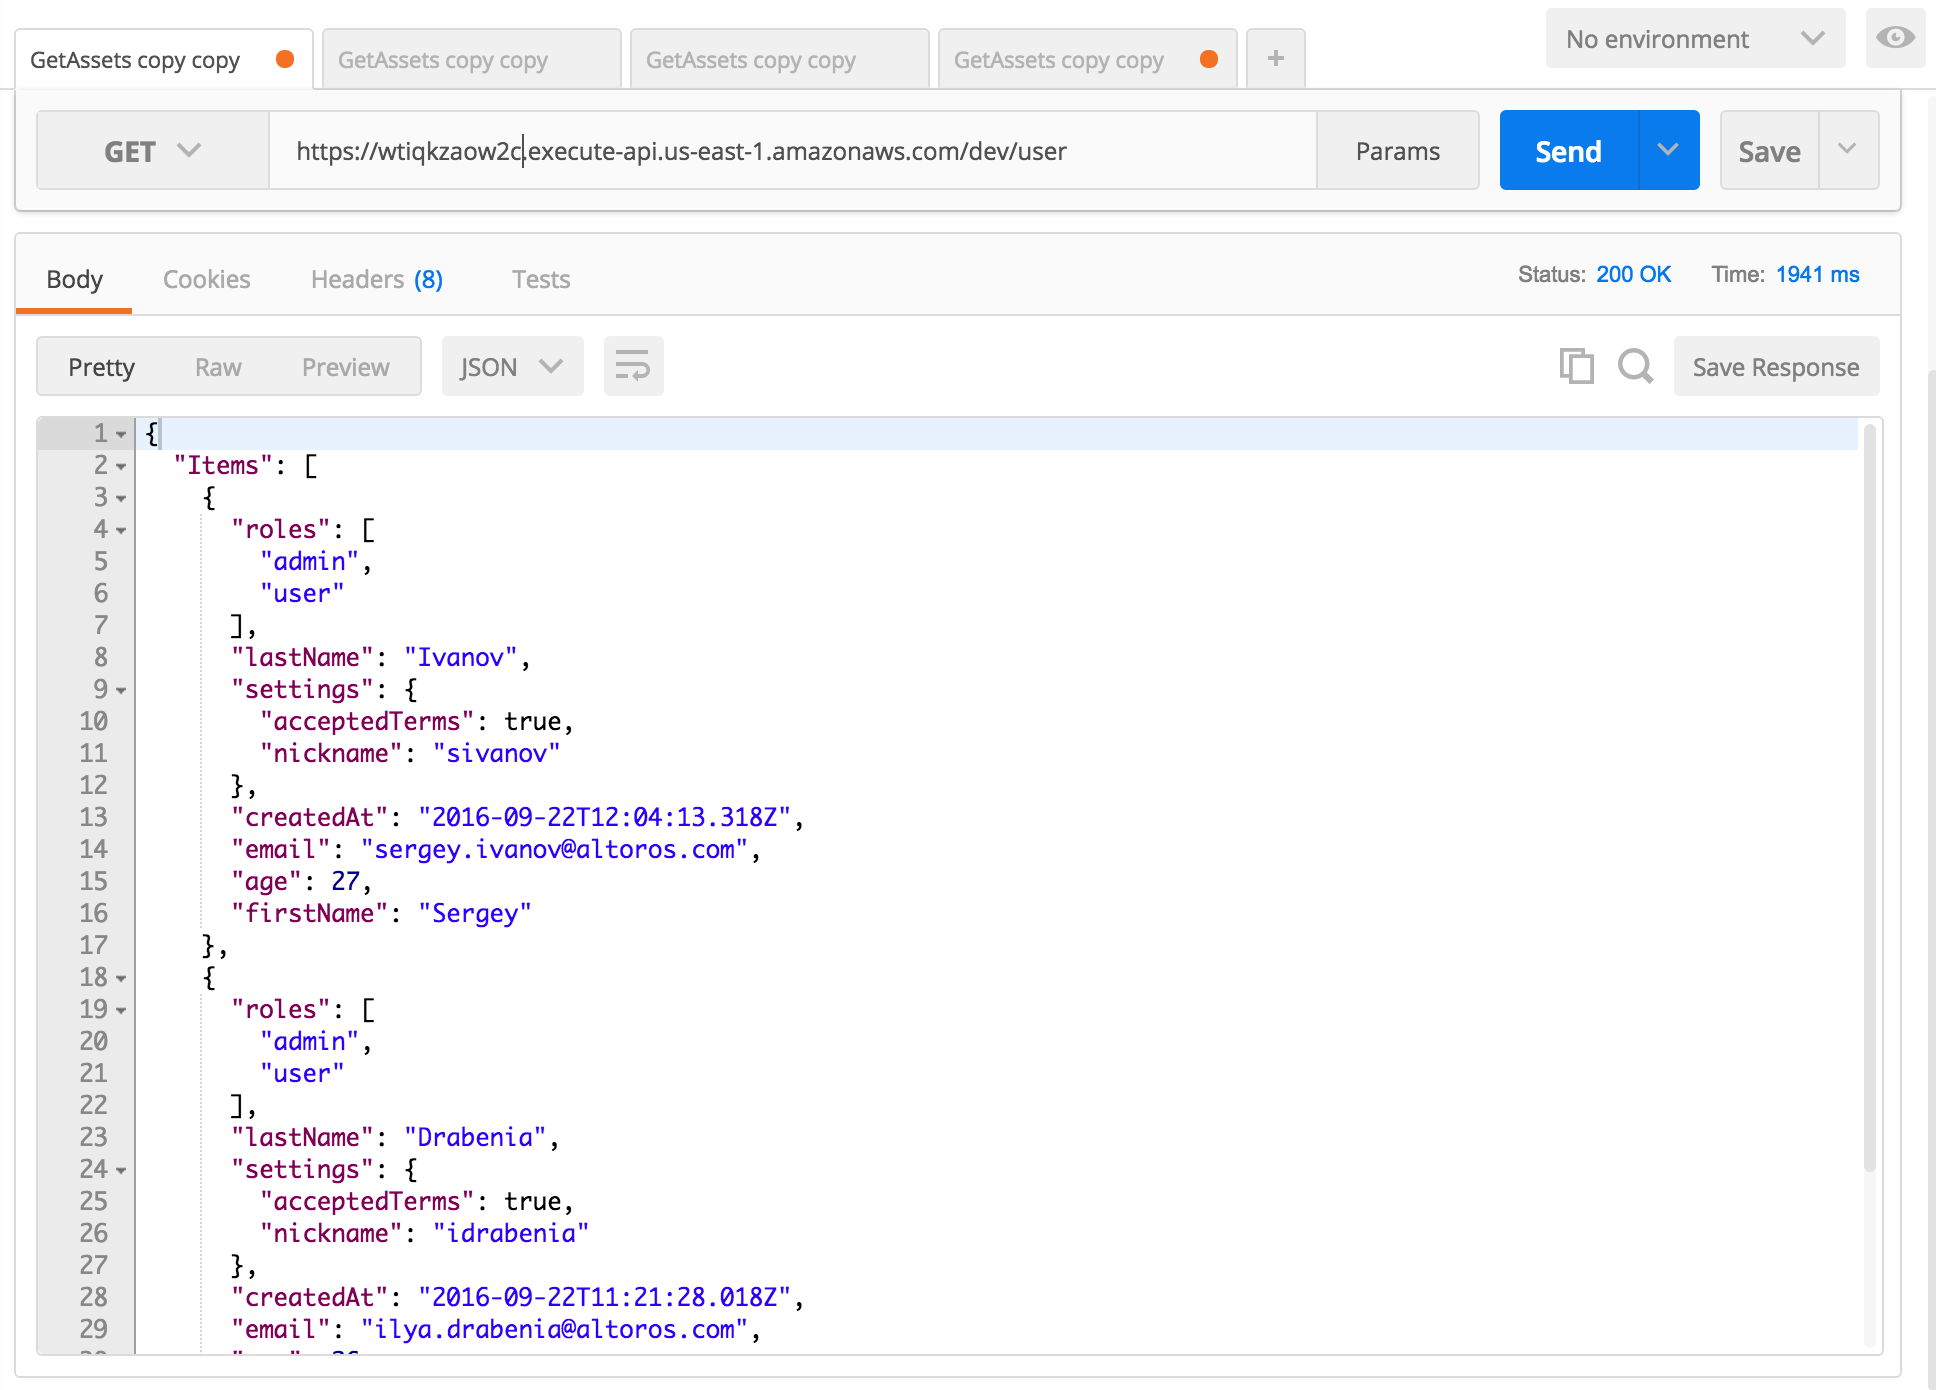
Receiving a list of users through the developed REST API
Conclusions
The serverless model promises new opportunities for low-cost computing. With libraries like the Serverless framework available, it is quite simple to use this architecture to implement fully functional applications. Overall, the serverless model seems to be a good fit for some small- and medium-sized web applications, including e-stores, corporate websites, forums, and blogs. Now available exclusively for AWS Lambda, the Serverless framework will hopefully feature support for OpenWhisk as well.


